Project:
I need to add a prompt to an installshield project that asks the user where the license key file is, then copy the file to the INSTALLDIR location.
This is going to be a fairly complex thing, First I am going to create an install script function that copies the file, then I am going to create two custom actions, one that executes the CopyLicenseFile installscript file, the other prompts for the File location using a file browser. Then I am going to create a new dialog that will call the FileBrowse custom action.
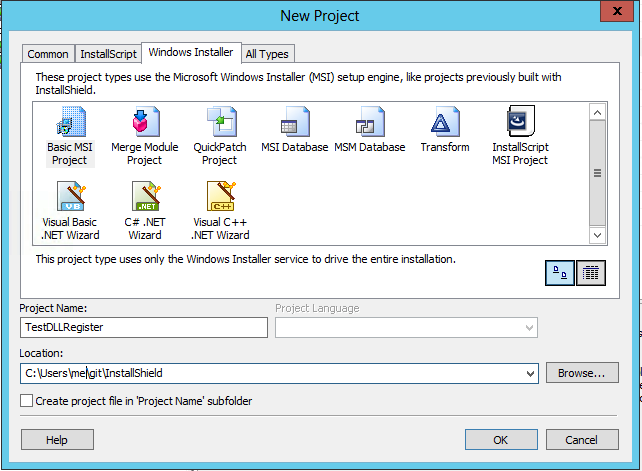
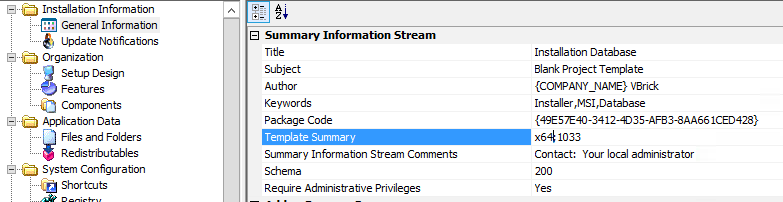
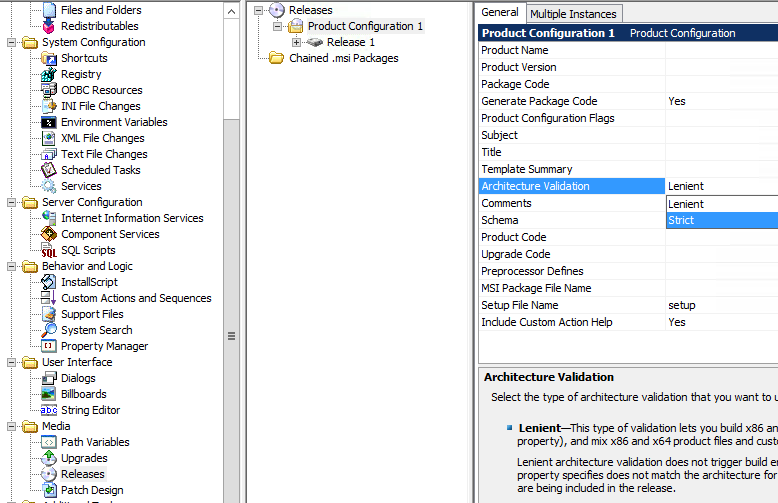
I am assuming you have already created a basic MSI project.
References
I used the following references
https://helpnet.installshield.com/installshield16helplib/IHelpIScriptEntryPoint.htm
https://helpnet.installshield.com/installshield16helplib/AccessingProps-DeferredCAs.htm
https://helpnet.installshield.com/installshield16helplib/FileOpenDialog-HowTo.htm
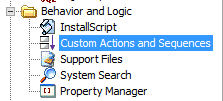
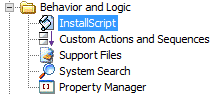
InstallScript
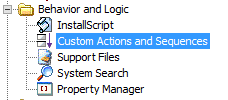
Expand out Behavior and Logic, and click on InstallScript
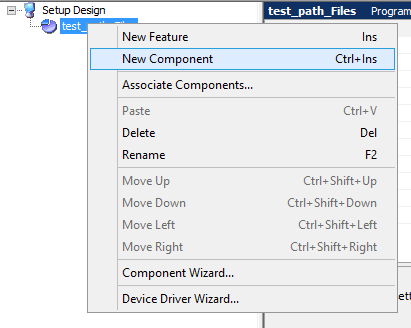
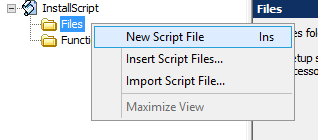
Click on the Installscript, then right click on Files and choose New Script File
Comment out the same code
//export prototype MyFunction(HWND);
///////////////////////////////////////////////////////////////////////////////
//
// Function: MyFunction
//
// Purpose: This function will be called by the script engine when
// Windows(TM) Installer executes your custom action (see the "To
// Do," above).
//
///////////////////////////////////////////////////////////////////////////////
//function MyFunction(hMSI)
 // To Do: Declare local variables.
//begin

 // To Do: Write script that will be executed when MyFunction is called.

//end;
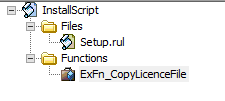
We are going to create an extry point function called ExFn_CopyLicenseFile Copy and Paste into the Setup.rul,
#include "ifx.h"
///////////////////////////////////////////////////////////////////////////////
//
// Function: ExFn_CopyLicenseFile
//
// Purpose: This function will be called by the script engine when
// Windows(TM) Installer executes your custom action (see the "To
// Do," above).
// The Function reads from the Property LICENSEFILE and INSTALLDIR, then copies the
// file LICENSEFILE to INSTALLDIR/LICENSEFILE
//
///////////////////////////////////////////////////////////////////////////////
// Include Ifx.h for built-in InstallScript function prototypes.
#include "Ifx.h"
export prototype ExFn_CopyLicenceFile(HWND);
function ExFn_CopyLicenceFile(hMSI)
NUMBER nResult;
STRING licenseFilePath;
NUMBER licenseFilePathBuffer;
begin
licenseFilePathBuffer = MAX_PATH;
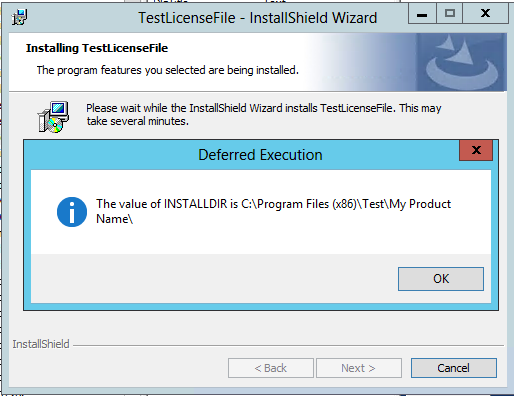
if(MsiGetProperty(hMSI, "LICENSEFILE", licenseFilePath, licenseFilePathBuffer) == ERROR_SUCCESS) then
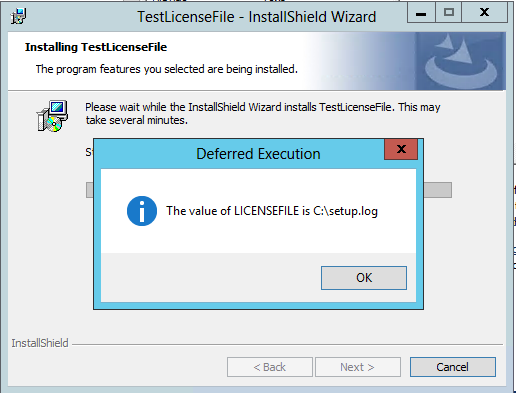
SprintfBox(INFORMATION,"Deferred Execution","The value of LICENSEFILE is %s",licenseFilePath);
SprintfBox(INFORMATION,"Deferred Execution","The value of INSTALLDIR is %s",INSTALLDIR);
endif;
// Copy all files in the source directory, including files
// in subdirectories, to the target directory.
nResult = CopyFile(licenseFilePath, INSTALLDIR + "license.lic");
// Report the results of the copy operation.
switch (nResult)
case 0:
MessageBox ("File successfully copied.", INFORMATION);
case COPY_ERR_CREATEDIR:
MessageBox ("A target directory could not be created.", SEVERE);
case COPY_ERR_MEMORY:
MessageBox ("Insufficient memory.", SEVERE);
case COPY_ERR_NODISKSPACE:
MessageBox ("Insufficint disk space.", SEVERE);
case COPY_ERR_OPENINPUT:
MessageBox ("Unable to open the input files in "+ INSTALLDIR +".",
SEVERE);
case COPY_ERR_OPENOUTPUT:
MessageBox ("Unable to copy the source files.", SEVERE);
case COPY_ERR_TARGETREADONLY:
MessageBox ("A target file already exists and cannot be overwritten.",
SEVERE);
default:
MessageBox ("An unspecified error occurred.", SEVERE);
endswitch;
end;
I have left in the MessageBox and the SprintfBox lines to aid in debugged, and would be removed for your production version.
You should now have file -> Setup.rul and Functions -> ExFn_CopyLicenseFile
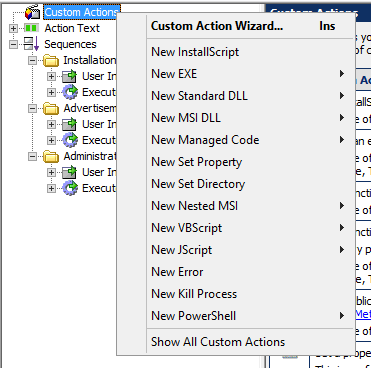
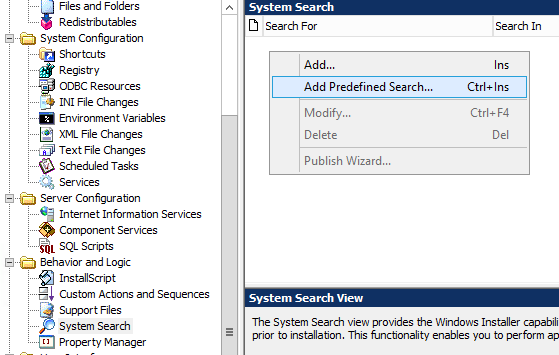
Custom Actions
Expand out Behavior and Logic, then click Custom Actions and Sequences
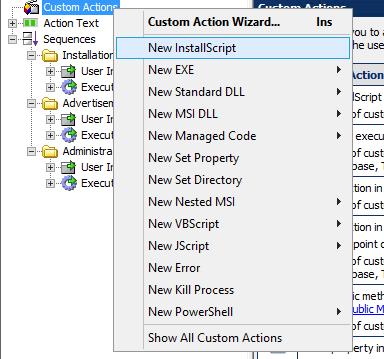
Right click on Custom Actions and choose New InstallScript
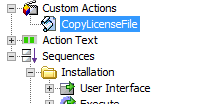
Change name to “CopyLicenseFile”
Set ‘Function Name’ to ExFn_CopyLicenseFile
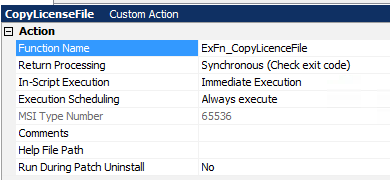
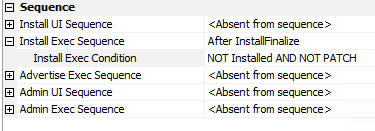
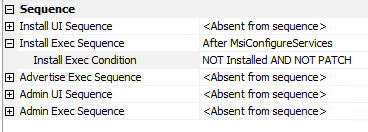
Set install Exec Sequence to After MsiConfigureService
Set the ‘Install Exec Condition’ to ‘NOT Installed AND NOT PATCH’ this will mean it only runs if the Product is not installed and this isn’t a Patch
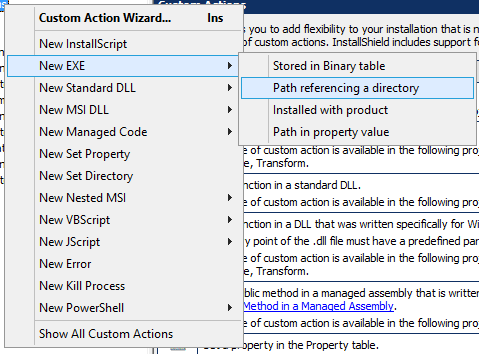
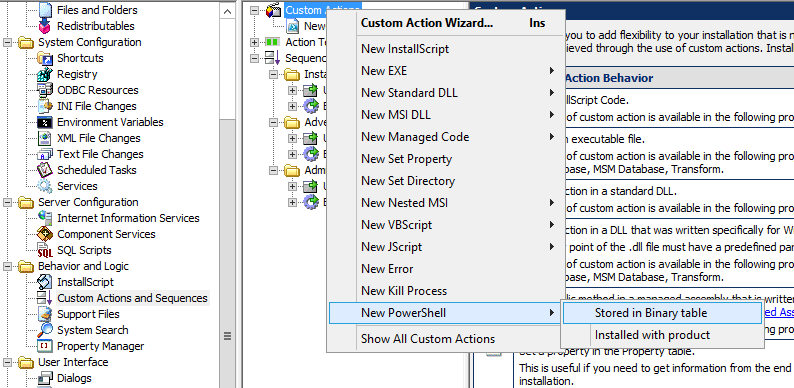
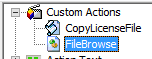
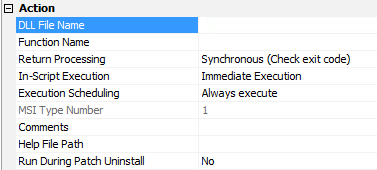
Create another Custom action, New MSI DLL, Stored in Binary Table
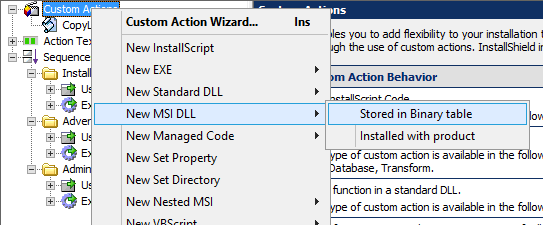
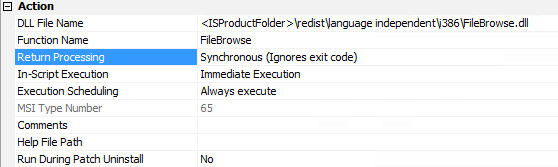
Rename to FileBrowse
In the right hand pane
DLL Filename: <ISProductFolder>\redist\language independent\i386\FileBrowse.dll
Function Name: FileBrowse
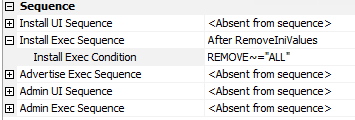
Return Processing: Synchronous (Ignores exit code)
In-Script Execution: Immediate Execution
Execution Scheduling: Always execute
For all other settings, leave the default values. The value of the MSI Type Number setting should be 65.
Create Properties
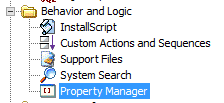
Expand out Behavior and Logic, and click on Property Manager
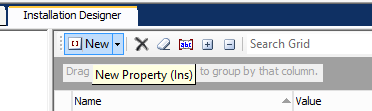
Click on New
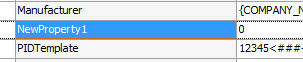
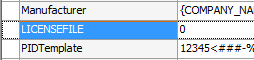
Rename to LICENSEFILE, since this starts with a CAPITAL it creates a global property that can be referenced later.
Create another IS_BROWSE_FILEBROWSED

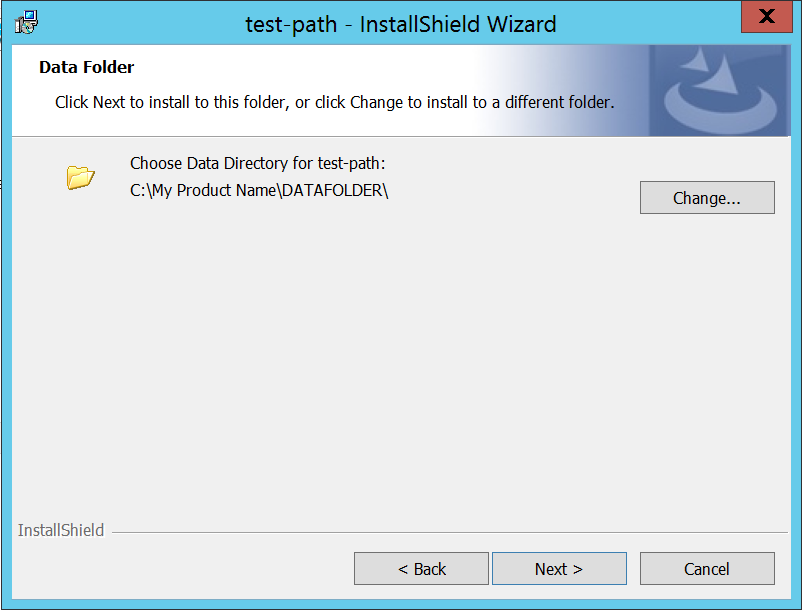
Create Custom Dialog
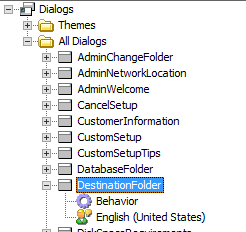
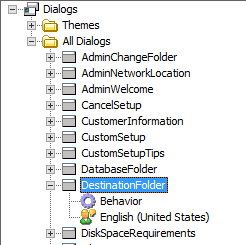
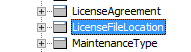
Expand out User Interface and click on Dialogs

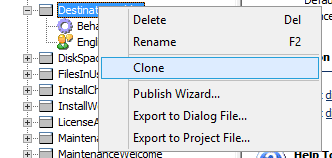
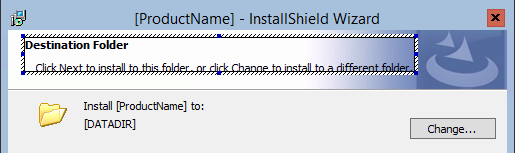
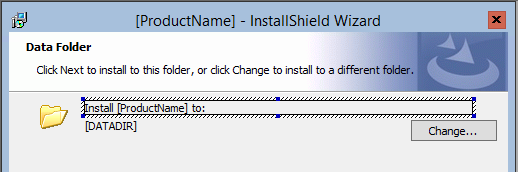
Find the DestinationFolder Dialog,
Right Click and clone
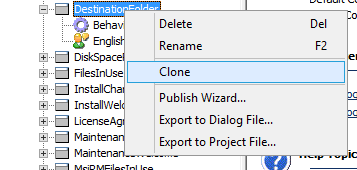
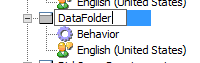
Rename to LicenseFileLocation
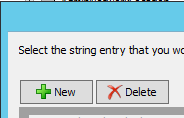
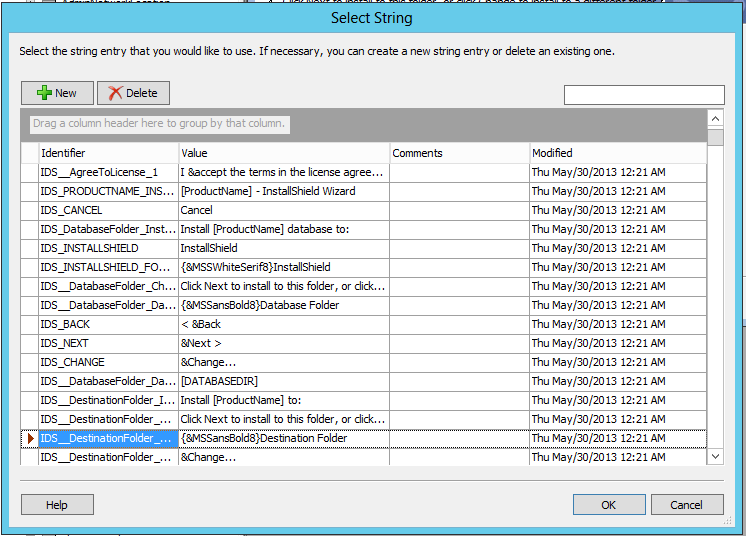
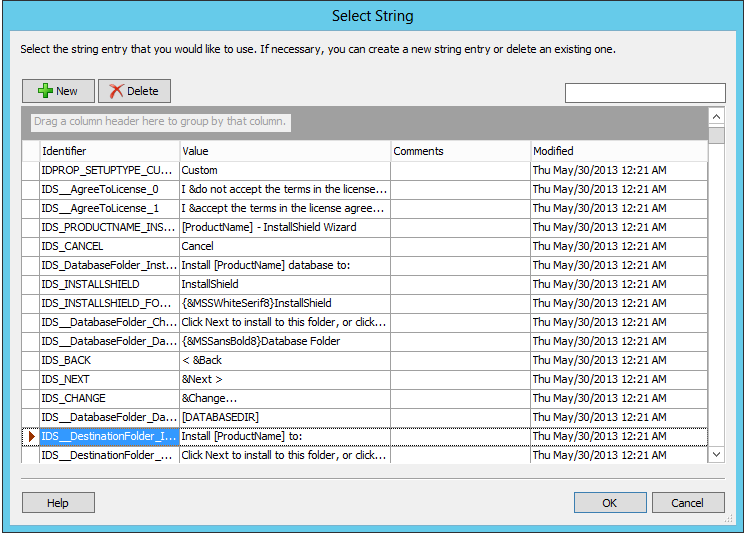
We are doing to repeat the following steps for a number of resources, the goal is to create a new STRING property for each string we are changing, so we don’t accidentally change the strings in other dialogs.
Click on LicenFileLocation, English (United States)
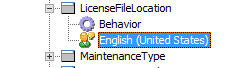
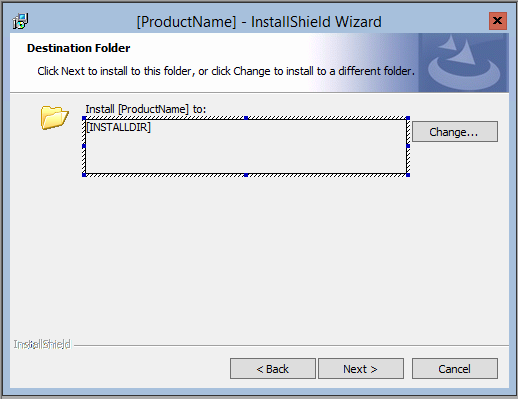
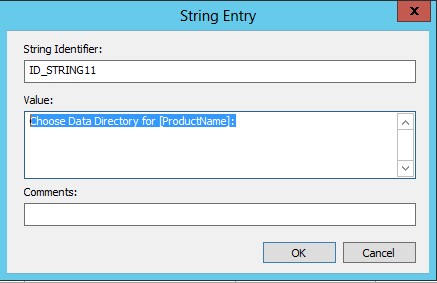
Click on the string Destination Folder so it is highlighted
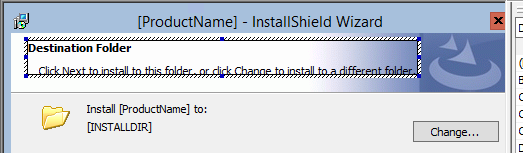
Click in the Text field where is says Destination Folder

Click on the …
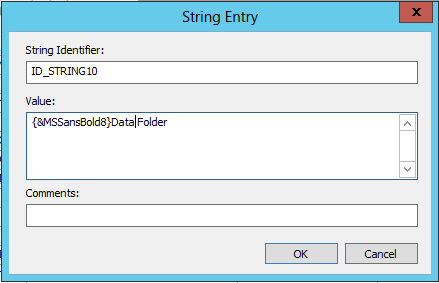
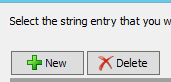
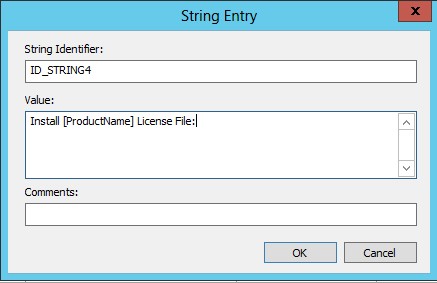
Then Cick on New
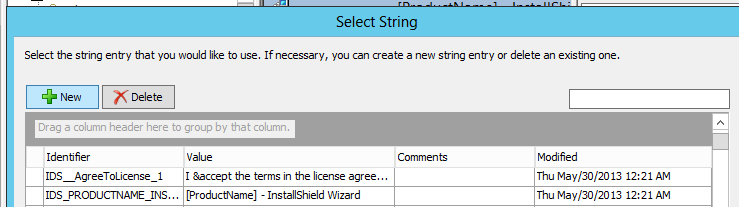
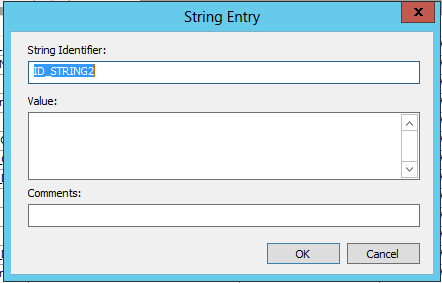
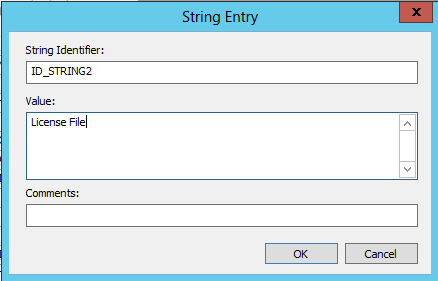
Change Value to License File
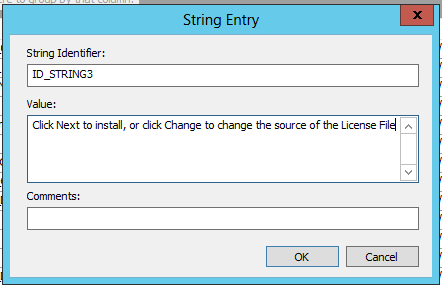
Repeat for “Click next to install
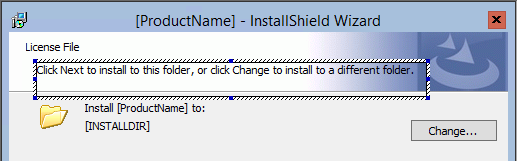
Change Text to “Click Next to install, or click Change to change the source of the License File”, remember to do the three dot and then new to create a new string, or you will also change the value in the dialog you cloned.
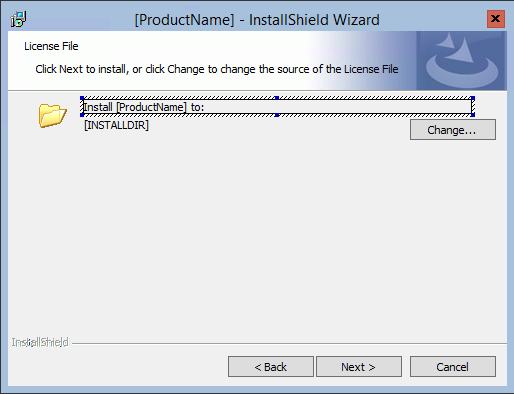
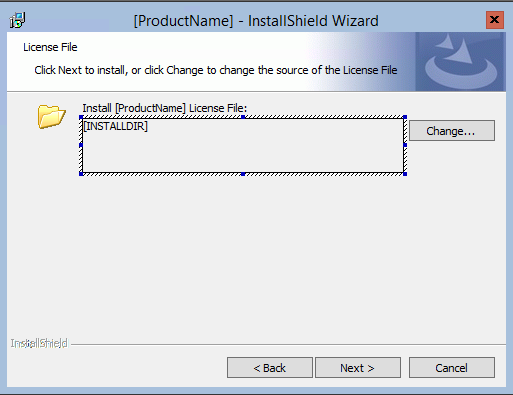
Change “Install [ProductName] to:” to “Install [ProductName] License File:”
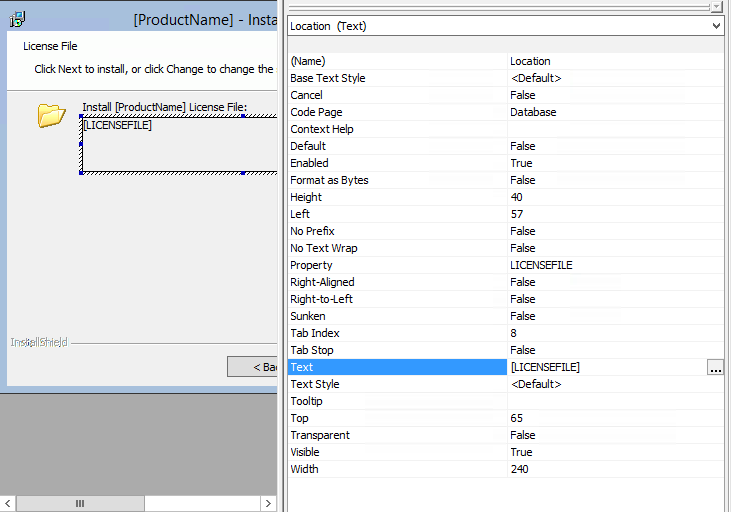
Click on [INSTALLDIR]
Change Property to LICENSEFILE
![]()
![]()
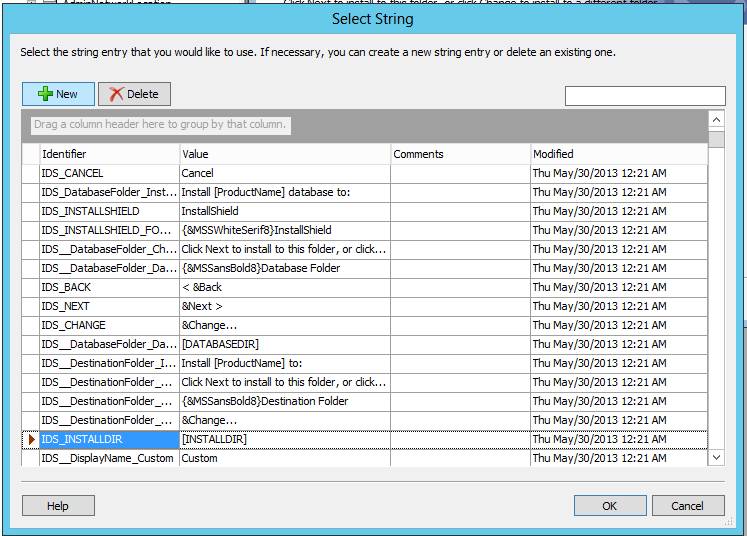
Change Text: to [LICENSEFILE], remeber the three dots and create new string
![]()

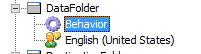
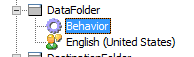
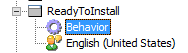
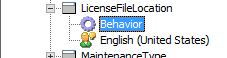
Click on LicenseFileLocation -> Behavior
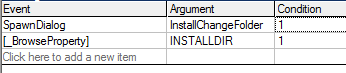
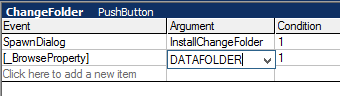
Click on ChangeFolder
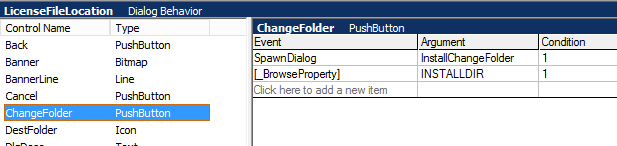
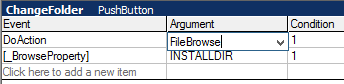
Change SpawnDialog to DoAction, and Argument to FileBrowse
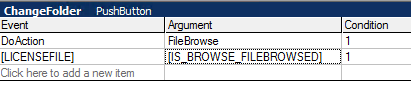
Change [_BrowseProperty] to [LICENSEFILE] and Argument to [IS_BROWSE_FILEBROWSED]
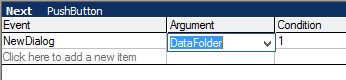
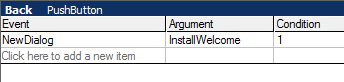
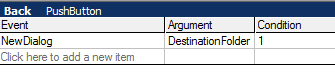
Click on Back
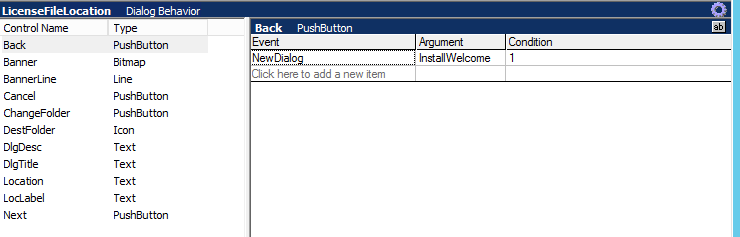
Change NewDialog to “Destination Folder”
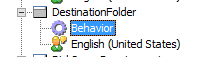
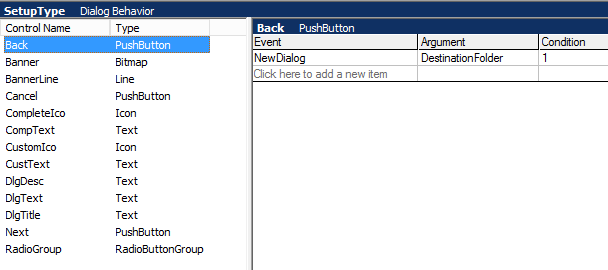
Click on DestinationFolder -> Behavior
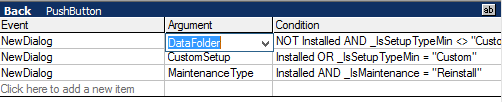
Click on Next
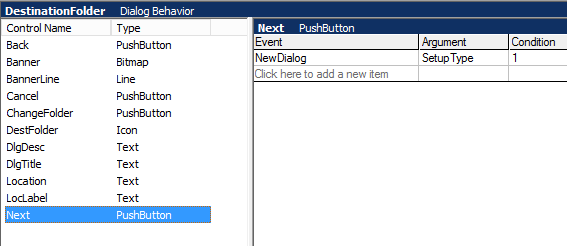
Change NewDIalog to LicenseFileLocation
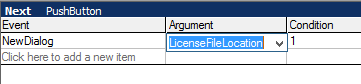
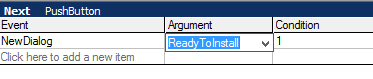
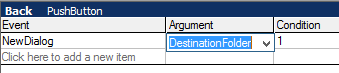
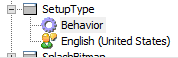
Click on SetupType -> Behavior
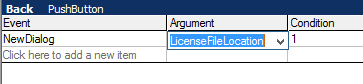
Click on Back
Change NewDialog to LicenseFileLocation
Test
Now the moment of truth, build and test, Why are not setting a default license file so it is pulling the default value from the property which is “0”
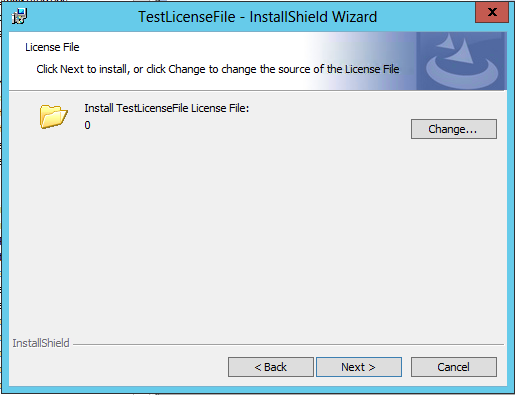
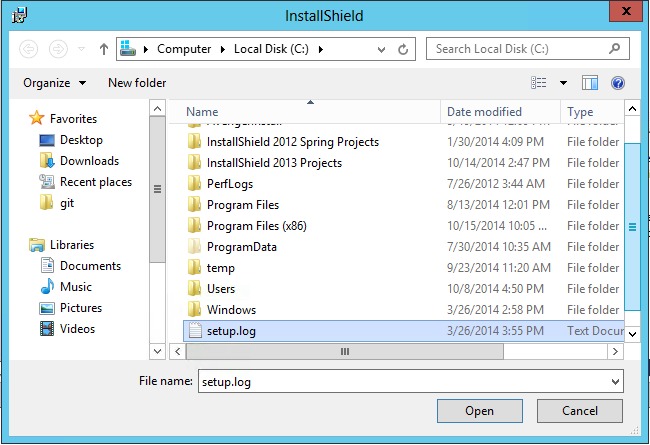
Click on Change…
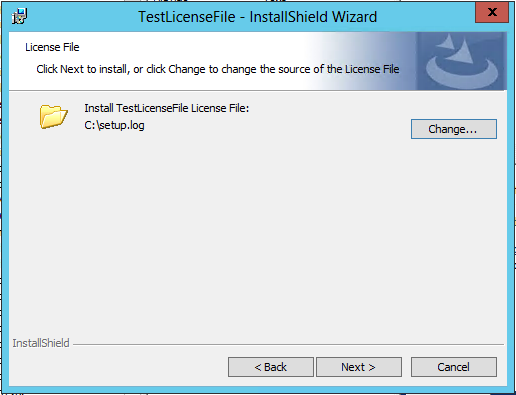
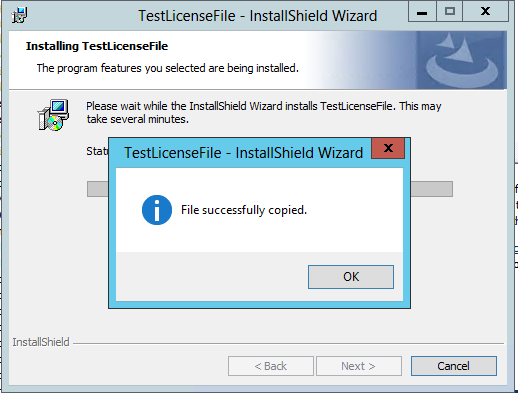

Succcess 🙂